I set my image sequence naming conventions up incorrectly and nether DaVinci resolve or ShotCut would recognise the sequence so I manually renamed each file and when that didn’t work I renamed all the files a second time. (I hope to find a automated method of doing this for the future)
I only rendered 25% of the frames because found this video interpolation software called Flow Frame. that fills in the missing frames using AI/ machine learning. However, due to the fast movement of the camera, the interpolation isn’t without the occasional visual bug. especially in the background. This probably wouldn’t pass for an absolute final render but for a project that I’m quickly running out of time on. cutting render times in half for a little visual weirdness when I’m already unable to get the fire particle volume to render its a no-brainer.
Tabs listed horizontally when there is far more vertical space,
nodes open ontop of each other in the shader graph when clicked to inspect.
Maya File browser,
tool settings resetting and forgetting placement.
Jungle of menus.
lack of up-to-date and helpfully concise online recourses.
created 2 faces in between 4 points while set as a quad
Maya fluid sim won’t work with GPU and so I now cant render the light with RT cores.
Maya fire rendering in Arnold
water shader being projected way off from its mesh
I found working with Maya incredibly frustrating infinitely so when compared to my time learning Unity. This was a large part due to the friction between running into unknown problems and the availability of recourse to get through those issues. If I had run into an issue in Unity I would be able to find a blog or video going over that specific issue and would take me 5 min to go over. sometimes I would have to go over a dozen recourses to find a solution that works for me but it felt like progress into the learning process. With Maya, you would be lucky if the resources weren’t using an out of date UI poor dictation and audio clarity, low resolution and with no crop. These online resources would go over basics for 10 min before getting to specifics then I would watch for another 30 min to find out that I need to keep digging because this did not solve or address my current issue.
I got so frustrated at one point I decided to watch a couple videos going over why Maya is “king” and used over programs like blender “in the industry”. Knowing that I was probably just being a baby and finding it hard starting from step 1 all over again. I listen to an ex Dreamworks employee talk about how great Maya is for lighting and animation but how he had never used it for modelled in Maya and used something called ZBrush instead.
This being said, I find it even more vital for me to power through and learn Maya, knowing that if an employer required me to use Maya at some point, I would struggle and I don’t want that kind of thing to limit me.
I don’t think this project is going to turn out in a way I’m happy with. In the future, I should plan production should start along with planning to help me to figure out my issues early and give myself time to learn from these follies. I didn’t balance out my time well while working parallel with the Introduction to Virtual Reality Unit and should have been putting in more work towards the project in the 2 weeks leading into that Units deadline. considering the headless I faced with a constantly Blue Screening computer leading to lost work and candled renders, living in a very remote part of Scotland over Christmas break and the huge hurdle we are all facing right now that come with the current pandemic.
After applying myself in small ways to every part of the scene I realised I wouldn’t be motivated until to progress until I had the trees in my scene as they cover the majority of my location and block line of sight that would get me closer to being able to visualise the scenes final composition. I thought I would use the trees found in the “”_”” In theory, It would save me a lot of time however In the pursuit of knowledge I thought I’d make my own and although with a simple form hopefully this will save on render time, with the foresight knowing I will create my renders very close to submission day. ill also be able to block more line of sight with denser trees.
Without displacement
With displacement
This, however, creates a lot of geometry and as I will be duplicating the tree throughout the island the rendering cost will grow exponentially. At this point I have a few alternative options I could procedurally Decimate and Boolean the leaves generated by Xgen ( this may be too advanced though), I could do that but with baked geometry instead of procedural or I could use a shader with something similar to a bubble noise texture as a normal map or bump map.
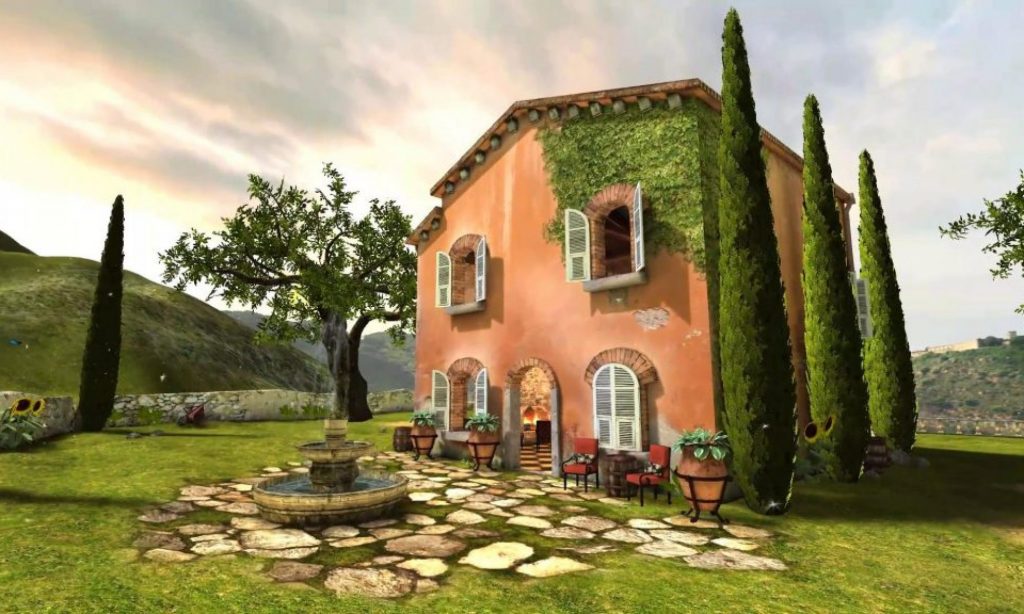
It didn’t take long for me to come up with an idea for a destination. I have always loved the lush green forests as depicted in the works of studio ghibli and works subsequently inspired by them. Before moving to London I was always just a short walk to get away from my obsessive use of technology, in Scotland it was “Beecraigs” and in England, it was “The New Forest” and despite these places being man-made you still felt a strong “spiritual” connection to these places evoking thoughts of the faerie, wisps and The Gruffalo. Now finding myself missing that and altho quite ironic maybe by using this style of the location I might be able to relive that itch and express these themes that I hold dear. I hope to use more fantasy elements to really make the Destination “Perfect”.
Forrest Stream
Floating Island
I started out planning my Maya Animation by collecting images to create an inspiration board that I might late use and modify for a reference board (being more specific and giving multiple angles) It’s very pleasant browsing the web for these images I have found many artists whose work I still follow through this process. I made an effort to not only find images of the terrain but with a slight emphasis on things to create motion like water flow, a campfire perhaps and fauna like Deer, Otters, Fireflys, fish and birdlife. I’m happy to take creative liberties in mixing fauna and flora from different parts of the world as
Using Quill I sketched out some models of Foliage like a couple of variants of Pine trees. My 1st attempt ended up rather messy and ugly where I had tried to create detail down to the needles on the tree however this increased the room for error and ended up hard to manage and rather memory intensive so on my second attempt I was far more focused on conveying the shape and silhouette of a tree rather than creating vast detail that when in Maya could be added with textures. I also created an even simpler tree that could be used in the background to allow quicker render times whilst being far from the camera.
Quill let duplicated and hand place trees into a scene I made from gutar pick shped strokes. this is where quill shines as I could shrink myself down in VR and quickly get an Idea of the scale of my scene this led to changes like moving floating islands further into the backgroud aswell as scaling them up and exstending the length of the river mouth.
I imported the terrain I created into Maya however the topology of the scene was really only useful to trace and as a scale reference. I started to trace the ground and water plains with Nurbs and converted them to polygons.
I modelled my tadpole in Maya fairly quickly and after watching a GDC talk on Creating the Art of ABZU I followed part of a Fish Shader Graph Tutorial to create its movement with Time and Sine node and using that to manipulate the vertex. the main issue I ran into was that the tadpoles texture UV’s weren’t aligned or cut down the right axis so as half the model would go right while the other would separate and go the opposite direction because the shader projected onto the model wasn’t uniform. easily fixed by going back into Maya and sewing and creating a couple seams along with a quick UV unwrap. then added a gradient that I could control with a vector to mask and ramp the “vertex wiggle” of the head.
Now that I had a tadpole I created an empty game object “Carousel” (that clearly I didn’t know the spelling for*) with a tadpole in positions like on a compass then duplicating and rotating 45 degrees. to give the impression that the tadpoles were under the water without actually being under the opaque plane I made there scale on the Y-axis 0 to flatten them down to silhouettes. Then in the in a similar way to the door, I used a timeline to record the parent “Carousel” rotating 360 degrees and then converted the keyframes into a clip track to have it loop indefinitely. I then repeated this for a clockwise rotation.
Magic Door
I spent quite a lot of time thinking about the magic door in the centre of my app. Inspired by The Doctors Tardis, Monsters.INC and “The Lion Witch and the Wardrobe”. I went looking on the unity asset store and created a new project to experiment in. I First looked at Pocket Portal VR that works by having the two worlds ontop of one another however this seemed quite advance and although It is relatively user friendly, I was unsure how I could shift the girl from one side of the portal while in the prosses of her animations. So I decided to look elsewhere. However, I did use the wood texture in the pocket portal package to texture the Door I made with simply scaled Unity cube primitives grouping them as a prefab.
I was confused about why the doorknob was flat to the door but this was because the doorknob was scaled in relation to the parent door that I had previously scaled on that axis to 0. this was a lesson in having simple and straight forward transforms placed on parent objects as to not complicate things when those traits are passed down. So after rebuilding the door with a stronger foundation, I added an empty game object where the hinge should be setting the transform to pivot and parented the door and knob to it. I then used the timeline to record keyframes of the door in an open and closed position using the graph editor to smoothen the motion toward the end.
Eventually, I Ran into this Portal stencil shader tutorial, this was exactly what I was looking for however the tutorial used custom textures and didn’t seem to work as expected with universal render pipeline and shader graph. leading me to find this AR stencil and shader with shader graph tutorial that I found far easier to follow taught me how to convert shader graph scripts to custom shader scrips. So I used the Clear “Portal” Stencil shader that renders materials with Stencil Ref 0. By placing a plane with the Portal material in the doorway and replacing all the room and girl materials with custom shader graphs with “Stencil { Ref 0 Comp NotEqual Pass keep}”. This worked a treat, however, I needed to switch the Cull of the Portals Back as the back of the portal would render the room even when the room is in front of the portal.
I will need to look into how to switch the girls shaders mid-game so that she will render when she steps through the door otherwise I will have to have her spawn front of the door or have her stay inside the room.
Edit: In hindsight having the door stay open thought the music video would put it to better use as I feel like having the door sink away after 10 seconds is a shame and as would have looked cleaner considering I didn’t manage to find a way to change the girl’s shaders as she walked through the door before my presentation. Where having the door stay would have created an opportunity for the girl to move about her room possibly give the frog man a show and tell or create a line between the characters too for some interesting back and forth mimicry/dance.
I am fond of Node-based programming and have dipped my toes into blenders shader nodes previously and have been eager to teach myself unity shader graph because of its potential interactivity and having seen its capabilities being used in VR chat.
I started to follow this tutorial on using the shader graph to create rain ripples but dropped it after my lecturer provided me material showing how to use unity particle system using a PNG and fading out a billboard with its lifetime. However, I wanting to use shader graph I figured that I would be able to use the particles lifetime as a control for the width of the ring and have it so as the ring grows in size, it thins until disappearing. But to get myself familiar with unity shader graph I decided to first use it to create an animated toon texture using this Wind Waker Water Tutorial as a guide.
I then realised that the Shader Graph doesn’t work without the Universal render package. but thankfully unlit shaders are very quick and easy to convert to URP shaders and can all be selected and changed at once.
After watching a tutorial on Custome Vertex Streams I figured out I could set a channel in the UV node to do just that by splitting the “B” channel of “RGB” also know as “Z” channel “XYZ”. That channel would carry the time value going from 0 to 1 as a decimal percentage of the particles lifetime. However, this ended up with the ring getting thicker as the decimal counts up leaving the ring with a thickness of 1 at the end. By using “(1-y=x)” this would flip the decimal percentage and give the intended outcome. I couldn’t figure out how to use shader colour however in tandem with partial colour so I couldn’t get the shader to fade as its lifetime ended, however, I know this to be possible however I moved on before figuring it out.
I wanted there to be a visual trigger for the ripples to create anticipation as It plays in time with the music. I first created a sphere that I scaled along the Y and gave it a version of the water shader with increased strength and decreased size. I liked the look of this droplet but due to its detail and busy nature in one hand, it felt out of place not fitting with my flat aesthetic and in the other using the same shader left if hard to read next to the water plane. Luckily I found a solution while watching rain tutorials and found this 2D Rain tutorial. I used this animated sprite billboard locked on an axis as my rain particle.
Mesh emitter
All that was left was to parent the Ripple to the Drop and set the Ripple as a collision emitter. For a while I had it set to the world so any collider including the player would trigger the ripple but the sprite’s hitbox is slightly larger than the image so the ripple would spawn about a foot above the water so I used a plane collider instead that’s slightly below the surface to align the ripple nicely with the water plane (this should also improve performance and eliminated variables in their behaviour).
I used two techniques to control where the particle would emit I had a single emitter trigger to the beat of the music I then created position keyframes that would move the emitter to where I wanted them. I had to set the particles relative to the world so the particles wouldn’t follow the emitter as it moved around. I then created a mesh with 7 vertexes in the locations where I wanted them to spawn and then triggered a burst with the timeline that spawns 7 drops 1 on each vertex at once. I created a second mesh emitter lower on the Water Plane as well, to trigger Ripples in the same spot just without the Rain Drop.
I showed a Flatmate my project and without missing a beat the 1st thing they said: “Could you make it prettier?”. I didn’t quite understand what she meant by that. I had set myself limits by using unlit shaders and I was very fond of the simple paper cut-out look it gave. So I started thinking about adding gradients to the materials or how I might create a “fake light”, a cone that would apply a hue over materials render behind it or perhaps use a stencil like I had used with the magic door. After asking her what she meant by suggesting it wasn’t pretty. she used Walkabout Mini Golf as a reference, as we had played it the night before. The awe she felt standing on the course looking up at the towering cliffs and down into the deepest depths.
I realised, for the most part, everything in my game felt flat and that from a design stance defeated one of the key joys of VR. So I simply duplicated the water plane and lowered it creating a sea bed I then created a copy of the material adding a vector to the alpha channel. the Top-Plane was made translucent and the Lower-Plane was made greyscale as to take on the top planes hue. Finishing it off by lowering the shaders scale vector to create the look of light refracting on the sand. This gave the added benefit of being able to simply lower the tadpoles below the water and having a variety of depths for them to occupy.
I now noticed that the water ripple particles where sometimes being drawn bellow the water and even more egregiously on top of the lily pads. By changing the LillyPad shader to Transparent with a 100% opacity fixing its Render Queue to 3000 and then shader graph allowed me to set the ripple and waters queue to 2999 and 2998 meaning that the LillyPad would always be on top of those materials no matter their transform.
Whilst looking for a model to use for my girl character I found these “MMD Vroid raincoat models” on Deviantart.com. MMD models are made for a piece of software called “MikuMikuDance” for the purpose of making CG fan dance videos. I have never used the software but MMD’s are widely used in the game “VRchat” as player Avatars. MMD and PMX files can be converted into FBX files with a Blender plugin “Give me all your cats” that comes with many useful features like quick material separation and automatic texture atlas.
The model was humanoid ready and only had to change the toes that had rigged themselves to the foot and the foot to the ankle. The model also came with bones weight painted to the “skirt” and hair that I let be for the time being as I plan to use the Dynamic Bones plugin that I purchased in the new year’s sale to add physics-driven swaying to them. In case, I don’t end up doing this I should remove the bones, as although having them their idle probably isn’t impacting performance greatly when it comes to optimising for mobile every little helps.
I modified the model to Simplify and optimise it for mobile VR cutting down from fifteen to five materials. Although I used only three material slots in unity but left two as to leave the option to use the model’s textured atlas in the event that I decide to change the visual style at a later point. I also decided to modify her clothes to align more with westerns abilities elongating her coat by scaling it along the Y-axis. I also made plans to add a hood similar to the one I sketched out in my Quill Maquet but decided that the character would probably read better if you could see her hair from behind.
I played around with different colour ideas originally believing I would use the Songs album cover as a direct colour reference and have the pink floor ripple to convey it as a liquid however this didn’t read as well as I would have liked. so regular blue water was what I ended up going with. and used Simple Sky, a gradient sky asset that covers up the solid sky that shared its colour with water plain, ging the appearance of an ongoing plain of water.
Double-sided “no cull” hair and clothes.
Unlit shaders { with GPU instancing turned on} gives me high-performance results that look good without lights present.
Room
I decided I want the girl to have a clear location rather than an indiscriminate void. So as I have been listening to a lot of Lo-Fi while making the “Game” I thought it would be cute to find the room used in a lot of the music playlist thumbnails. luckily there had been a challenge to recreate just that on Sketchfab and using there Blender plugin imported it into Blender to optimise the room for Unity. using Decimate, and creating and joining meshes. whilst creating a doorway with a separate material that I could attach a transparent portal shader to. Fully enclosing the model.
I created a version of the model with a box coming out the front to use as a transition point for the girl to switch her shaders however I discarded this version of the model as the box would reveal the wall around the portal as well as the girl.
I used the “Easy Combined” asset in unity to quickly join all the objects in the room into one mesh as to cut down on draw calls as seen in the Profiler.
Before
After
I found a Toxic Frog asset on the unity store. however, this frogs skeleton isn’t humanoid so if I wanted It do imitate the girl’s animations I would need to convert the frog. I moved the frog into a standing upright position in Blender pose mode and weight painted the eyes to move with the head. I then tried using CATS fix rig fusion this gave me a humanoid rig with blend shapes for the eyes mouth and tough still intact but unfortunately Maximo wouldn’t work with this setup.
Ended up removing the rig entirely and keeping the Pose enforced by CATS on the mesh and importing the hollow mesh in Maximo where it generated a new simpler mesh that naturally would work perfectly with Maximo’s motion capture library. It wasn’t quite that simple as the jaw seemed to be independent of head turns so using blender again I edited the weight baiting on the Jaw and head bone and used sculpting tools to slim down his body. In unity, I swapped his materials for URP unlit shaders similar to everything else and created an animation controller that would blend humanoid animtaions together.
I want to pick a song for my music video that I hadn’t heard before as I’m aware that ill have to listen to it over and over again I’m also going to be wherry of length. I went through a playlist made by a Twitch streamer I Enjoy and listened to each track. specifically listening to see if any of the music conjures any strong images in my head that I can build from.
I ended up picking “Frog Summer” probably due to it containing diegetic sounds and clear sound queues. Also who doesn’t Love Frogs!
An Idea I played with was integrating quill into my production pipeline and played around, importing the maquette I had made into Maya, with stronger knowledge and mesh discipline in quill I could see it possible to at least use the models made in Quil to use as a reference as a trace for modelling in Maya or in a best-case scenario use them directly. However, the topology generated by quills brush strokes is in most cases seemingly unusable. I would love to revisit quill or perhaps another tool but until modelling features like “Bloolen” are implemented it will remain a quick and effective way of developing a visual look and feel.
I’m glad I tried to use Quill as it helped mobilise my brain into thinking in the 3rd Dimension whereas creating storyboards naturally was limiting I also found that storyboarding with the 360 video template was even more unhelpful as everything is laid out in relation to the user and unlike 360 video true 6 DOF VR allows the user to move freely around the scene. my hypothesis is that planing out scenes for VR would work far better-using technics shade by stage performance as theatre requires planing for multiple viewing angles better than films single fixed viewing angle.
In our recorded content and lectures we looked at scripts that let us change the unity scene as well as simple game interactions and locomotion with teleportation.
My Idea is lacking any kind of VR user interactions so far. It would be good to set up bounds for the player to move around the scene perhaps using the VR teleportation locomotion that we looked at in a lesson. To make use of VR I thought It would be a cool idea to have it so the way you start is by throwing a frog spawn into the water that would trigger the music and then have it so dragging the egg smaller or larger would, in turn, change the scale of the player allowing a viewer to watch it multiple times from different sizes.
Our 1st task as part of the introduction to the virtual reality unit is to make an AR detective game. I created a “Padlet” to plan out a linear game where after finding a dead body you have to follow clues like footprints and blood splats to find a terrifying supernatural murder.
Step 2 feeling out unity and AR tools
We have been using
Step 3 understanding technology going back to the drawing board.
Step 4 creating a prototype
Step 5 Adding a little flair with Maya and win state